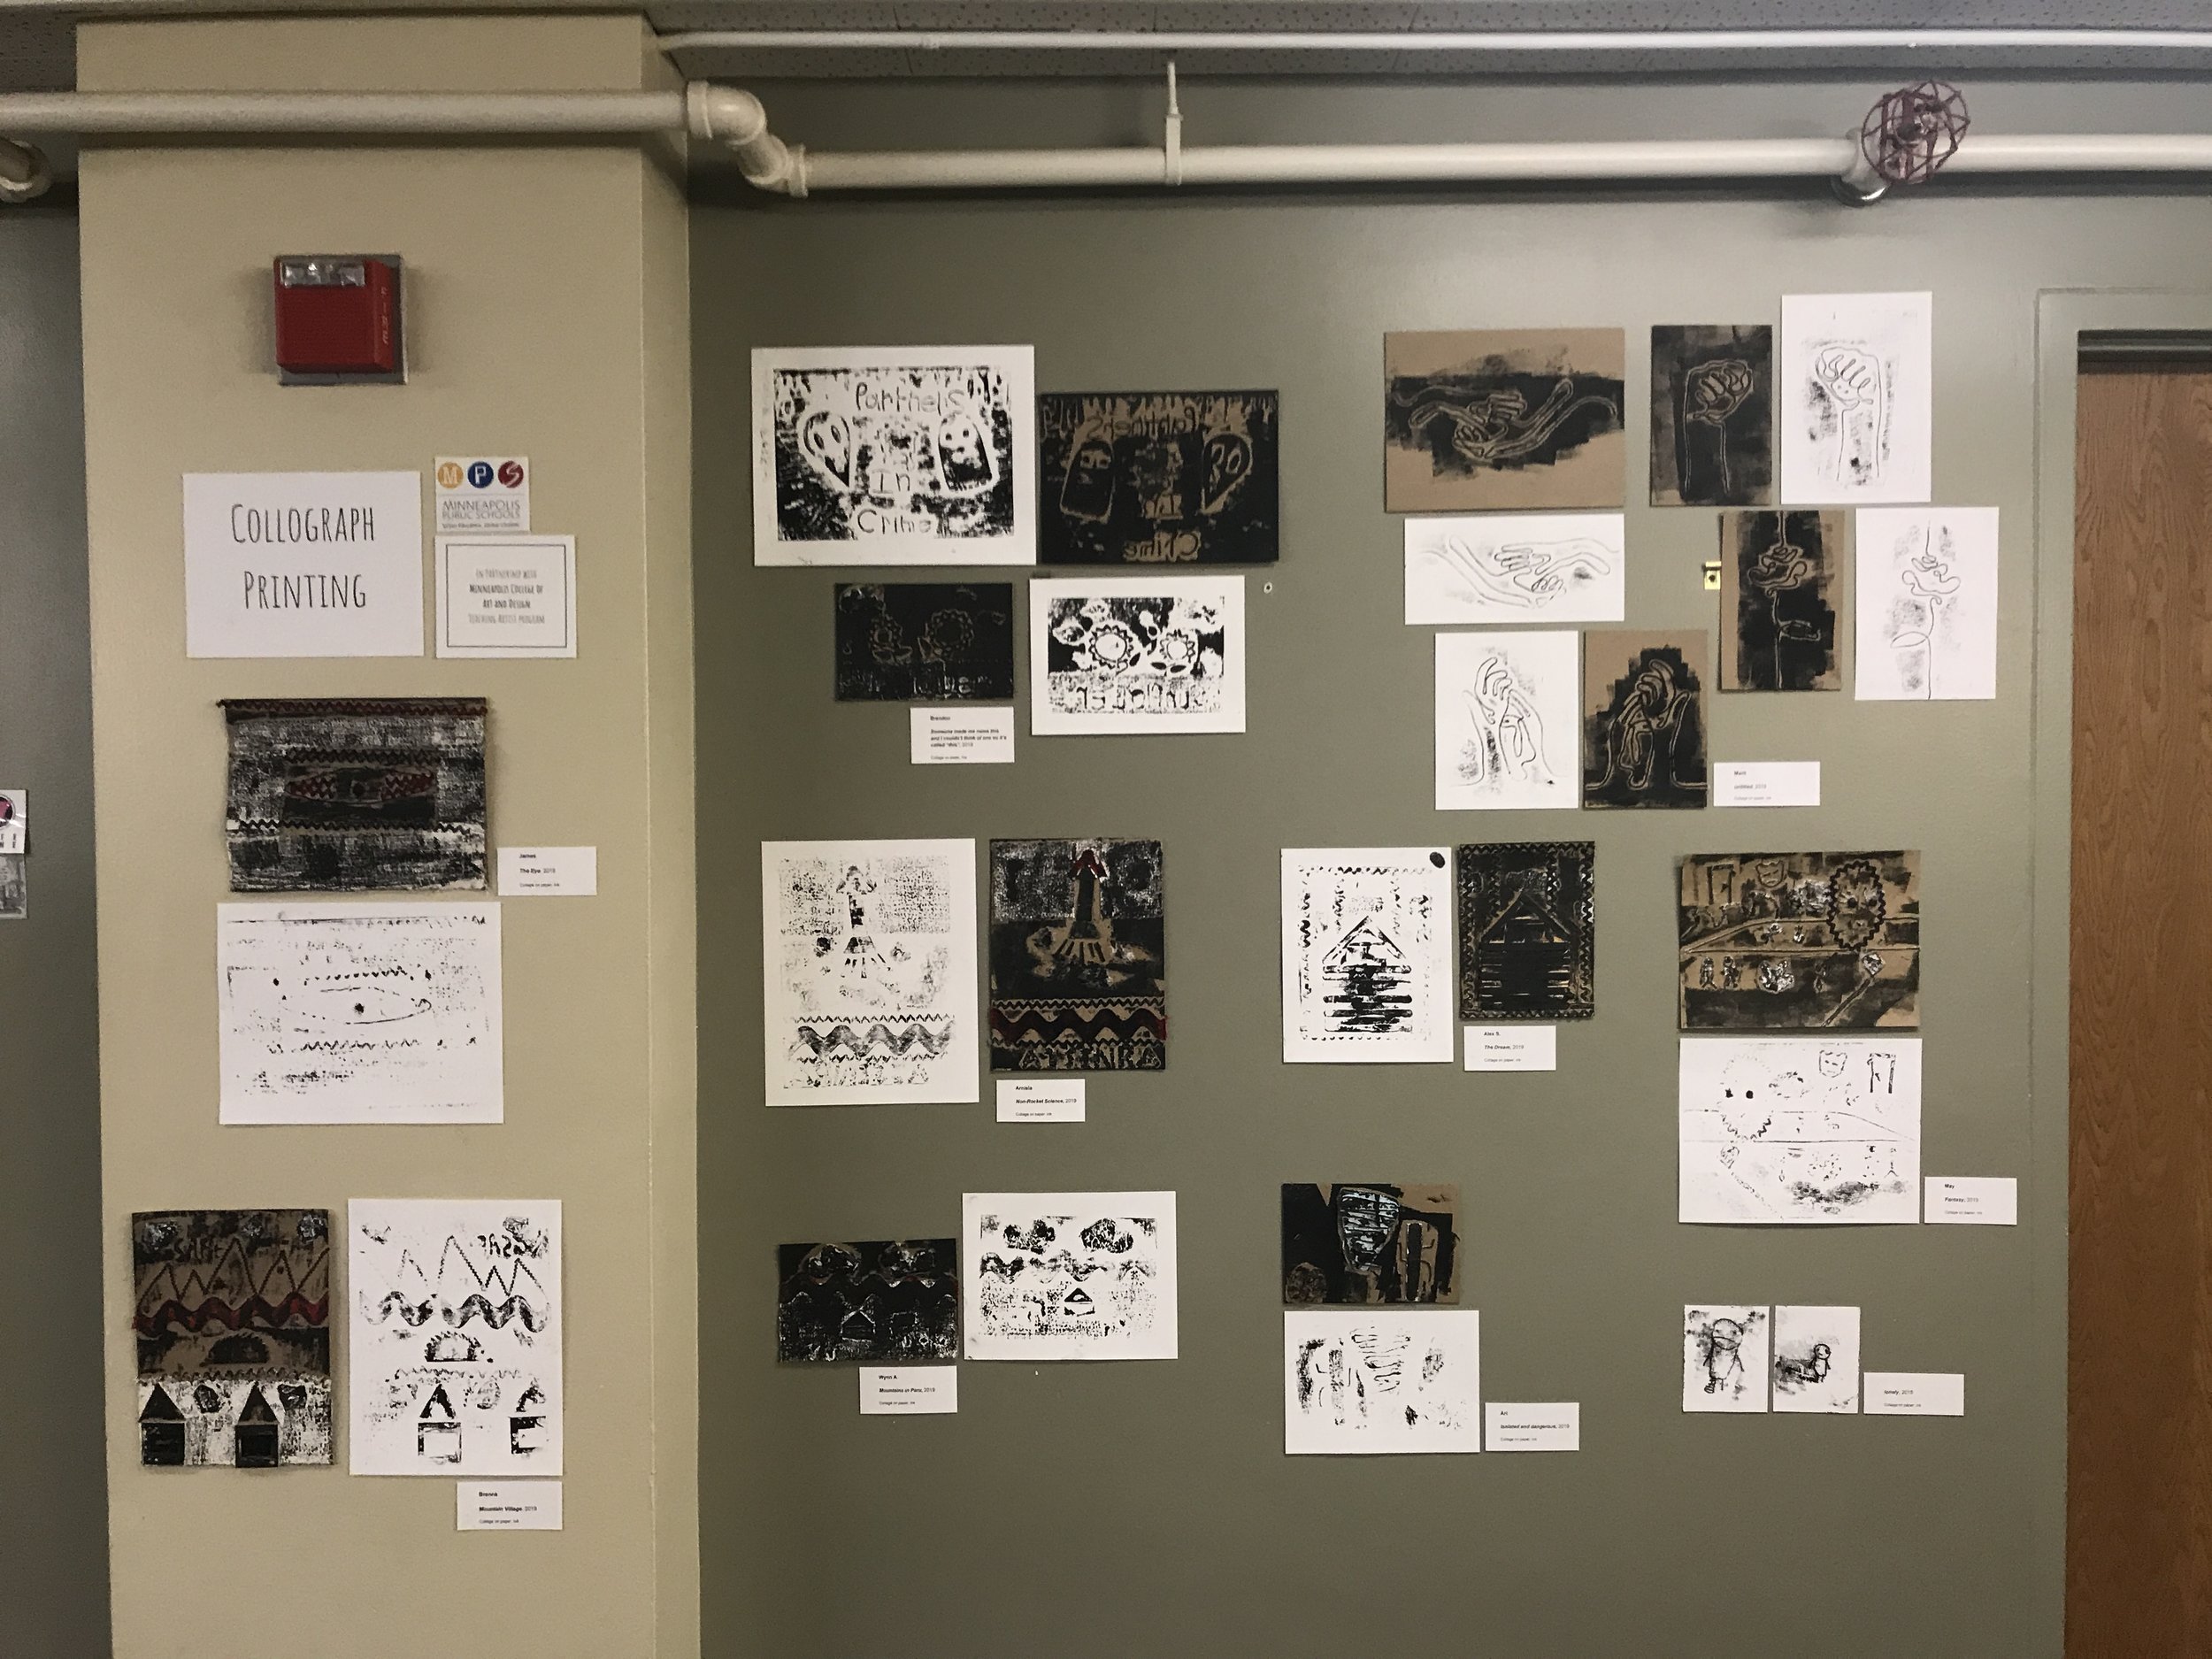
Collagraph Printing
School/Teacher/Classroom or Arts Organization/Mentor: Carmen Elate
Grade Level or Age of Participants: 7th-12th grade
MCAD Teaching Artist: Lindsay Ajdukiewicz
Number of Students: 20
Visual Arts Content or Standards
9.2.1.5.1. Create a single, complex artwork or multiple artworks to express ideas.
Overview of Project
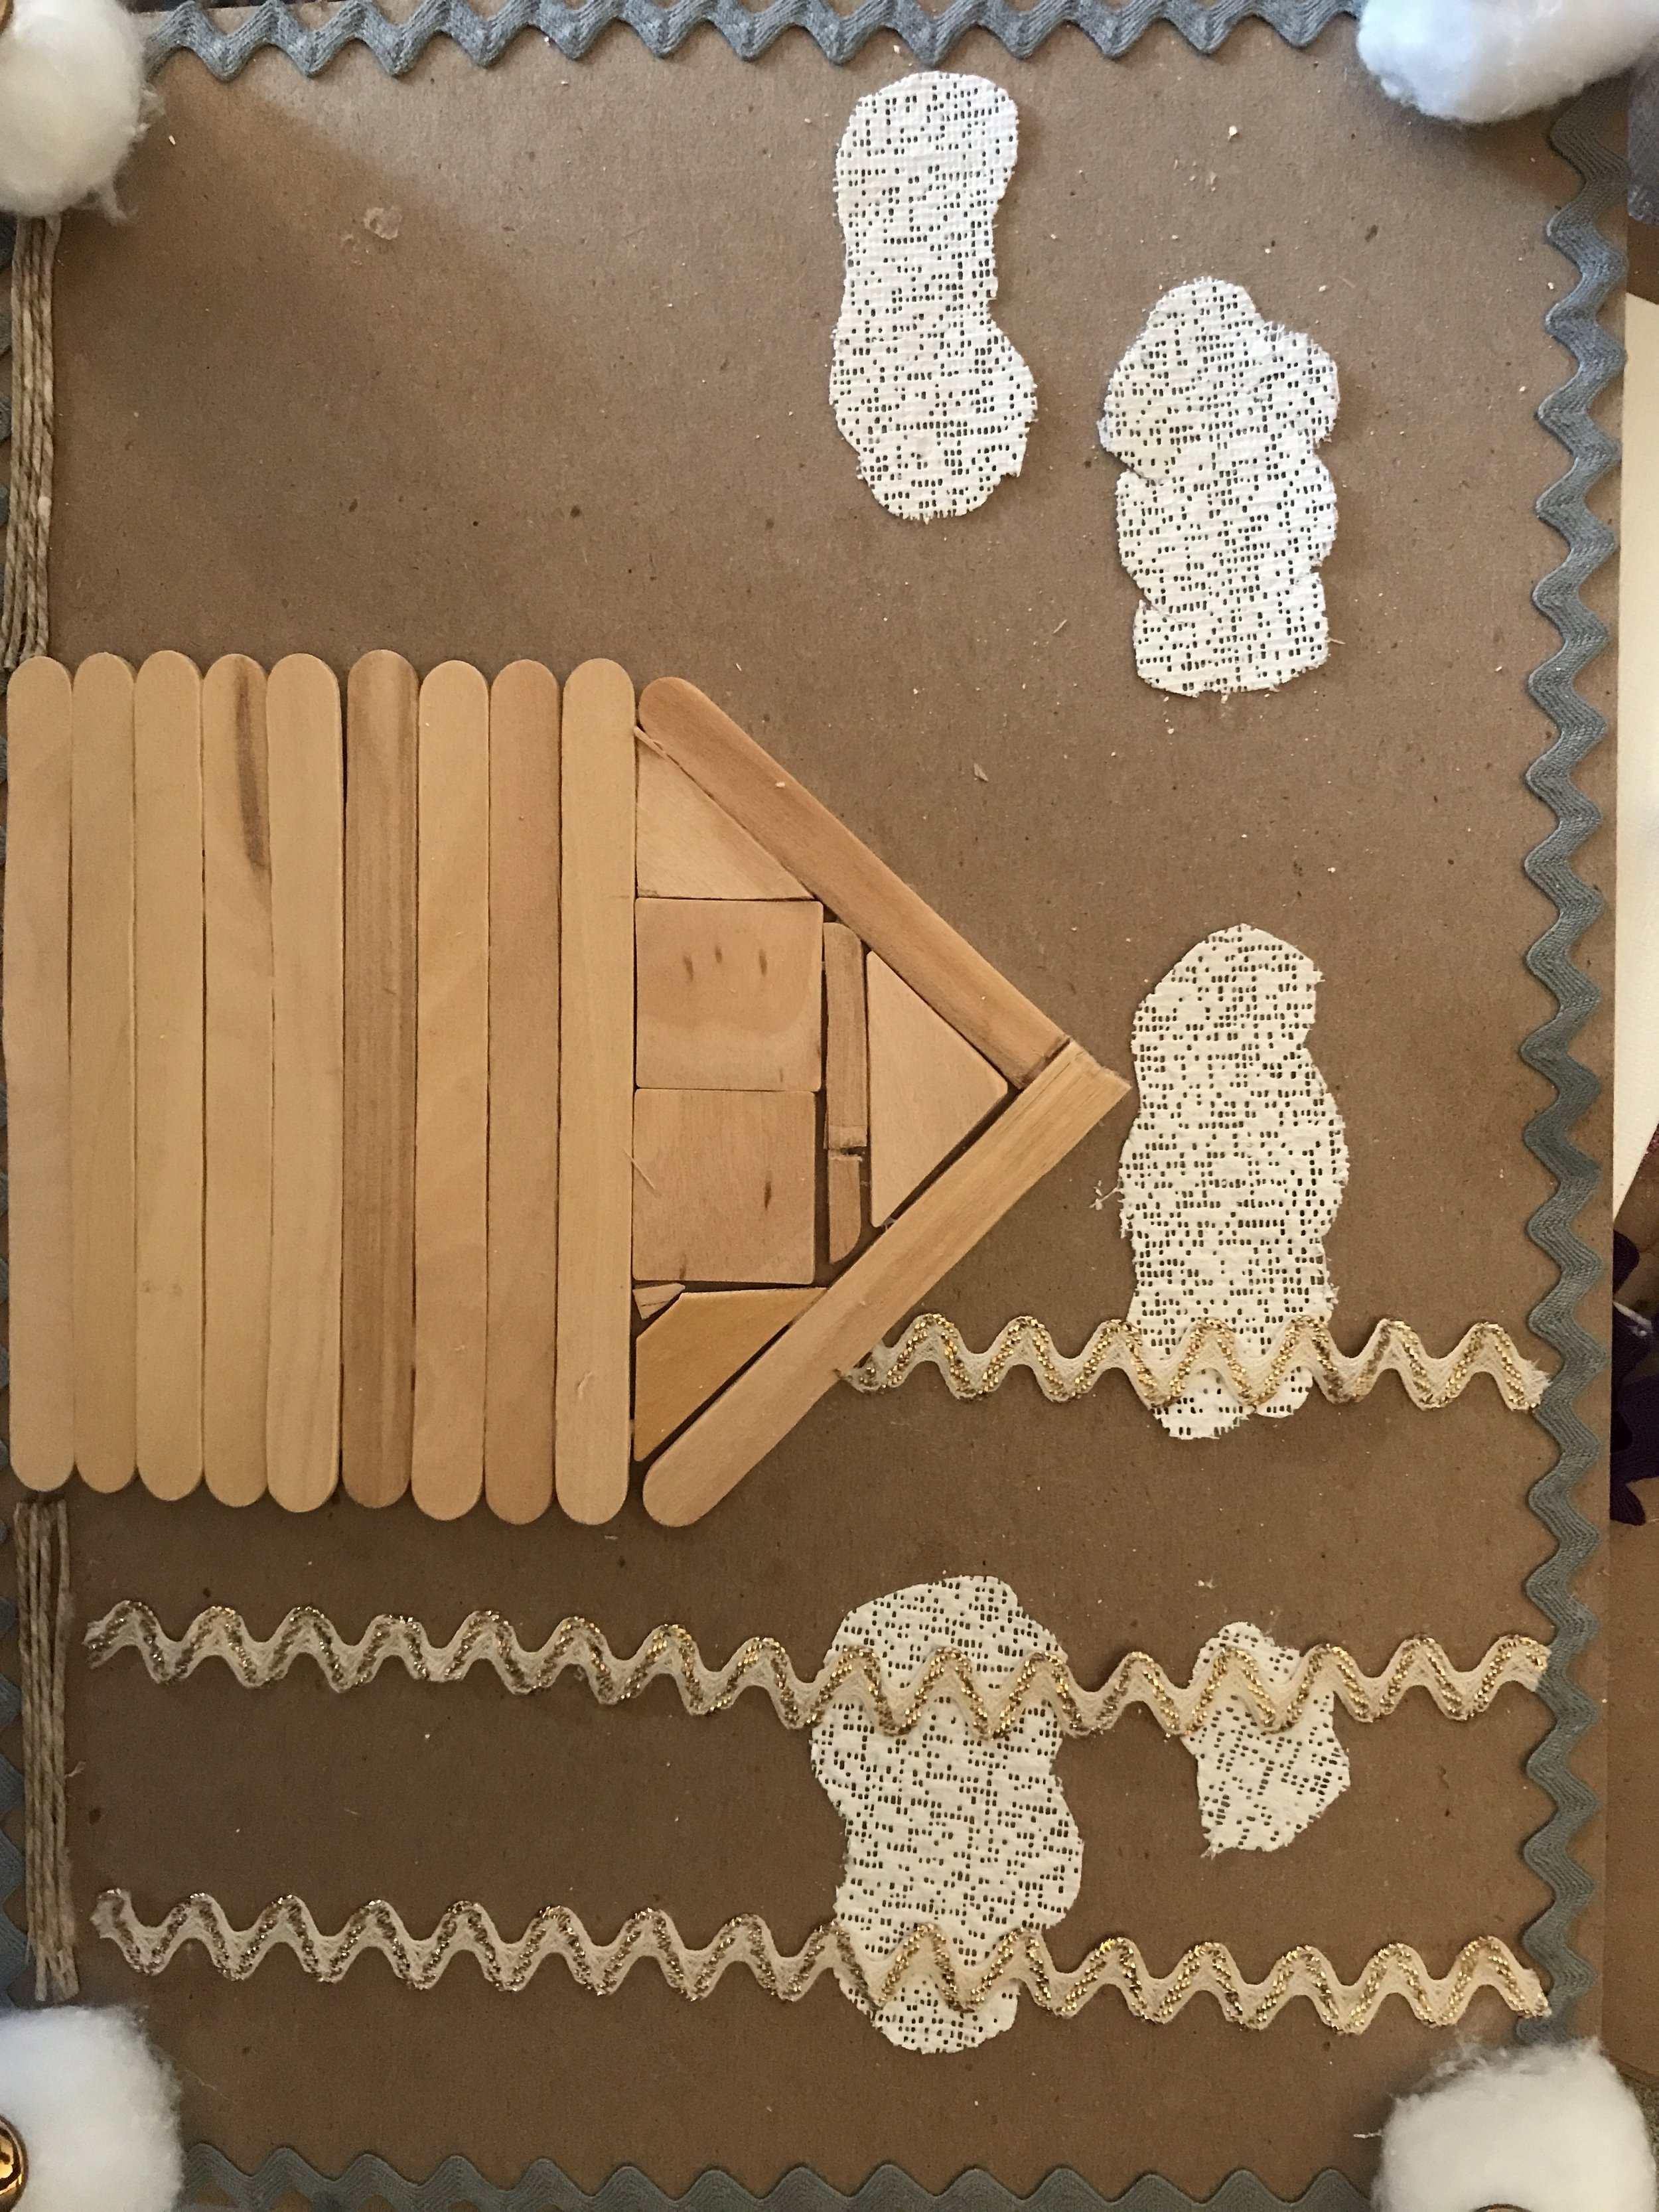
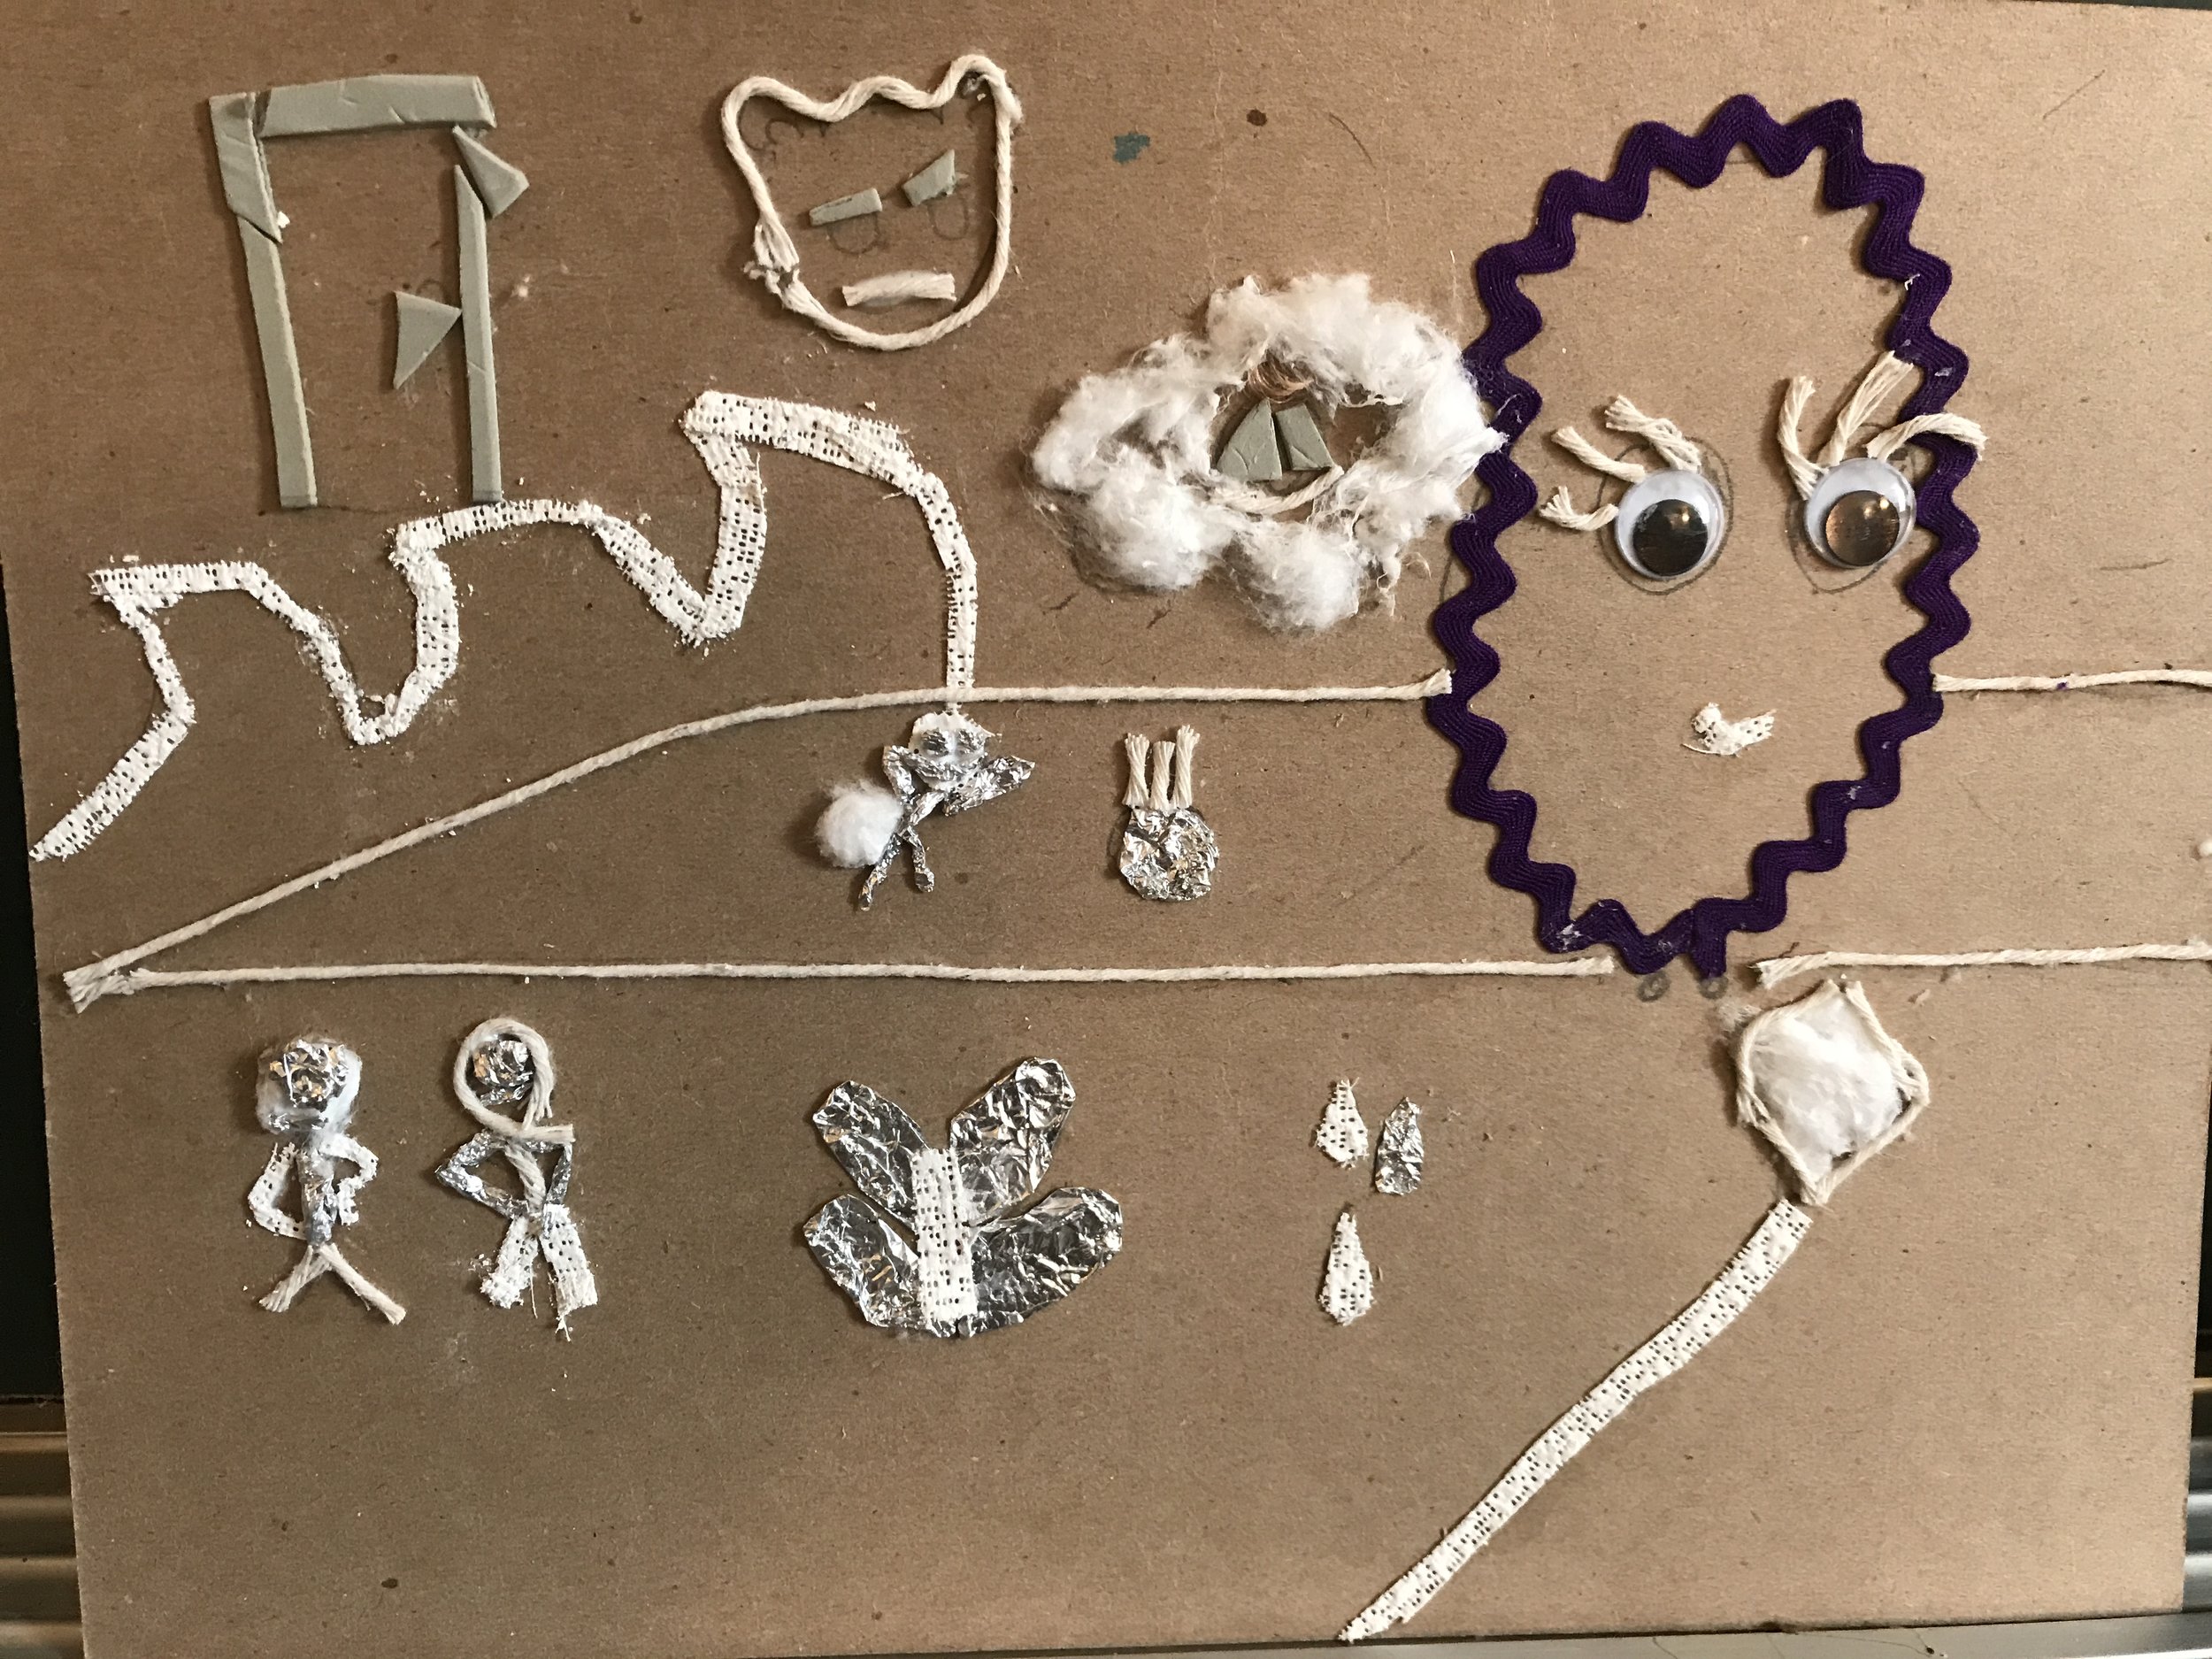
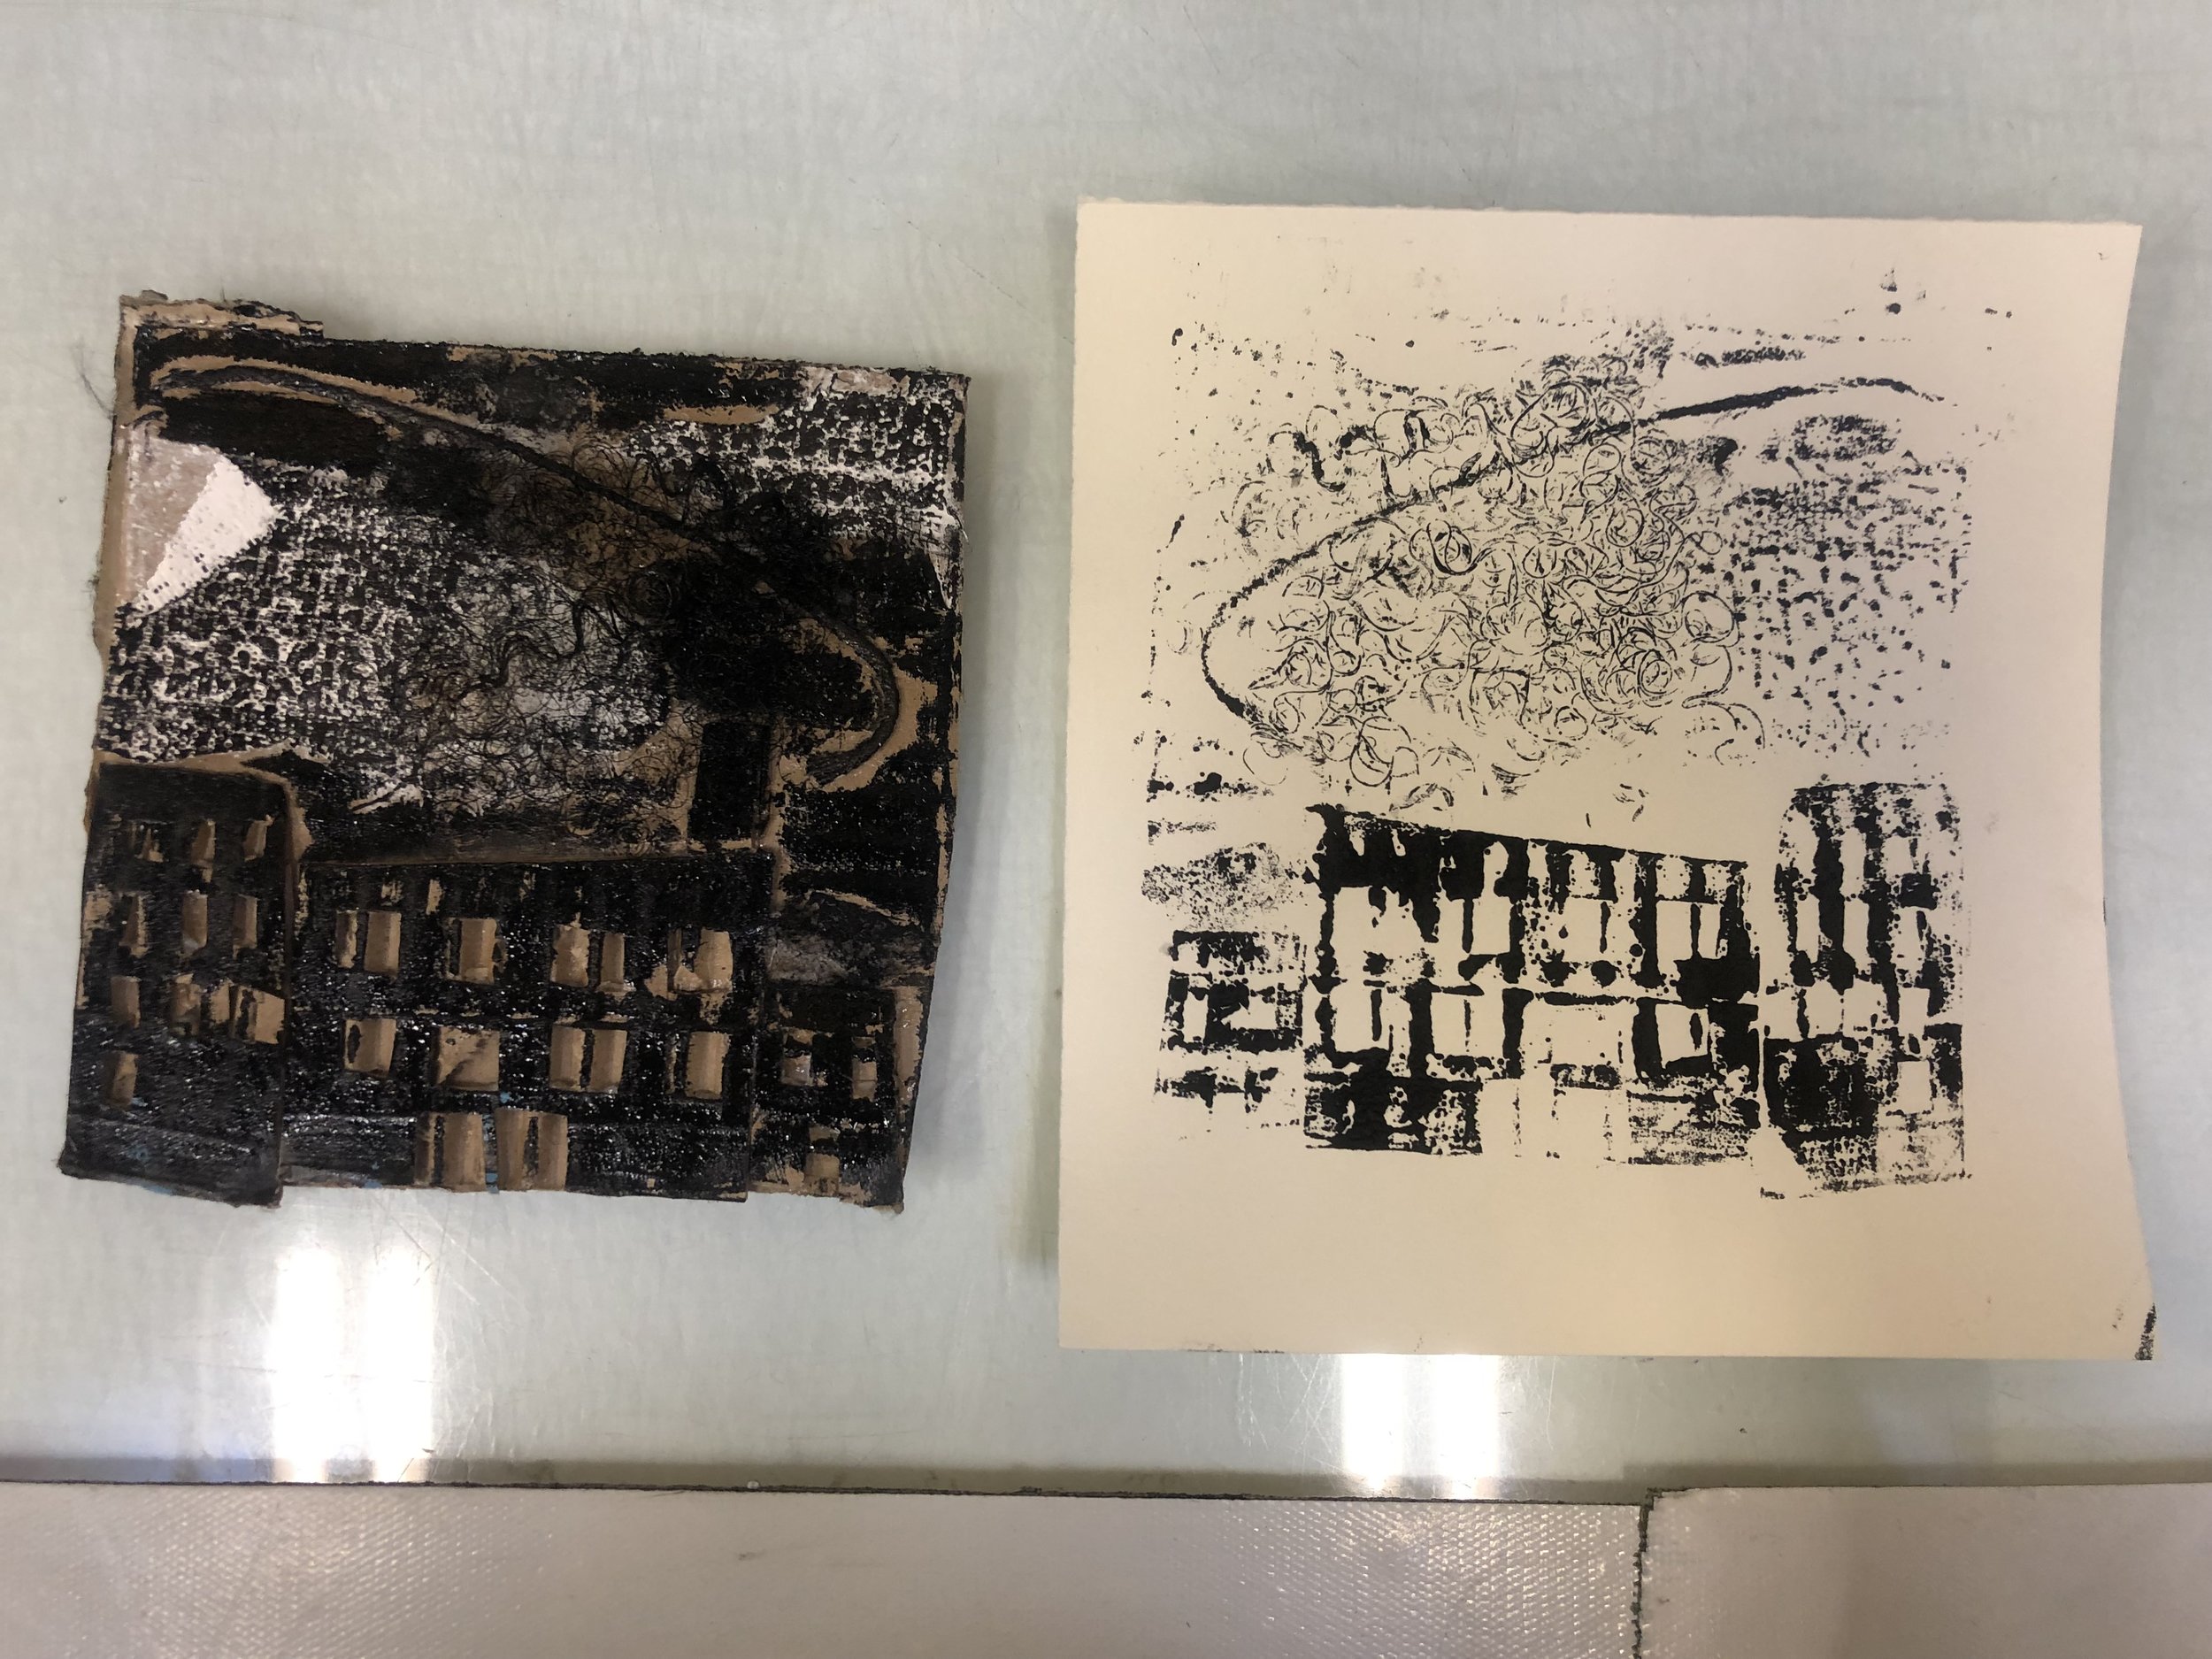
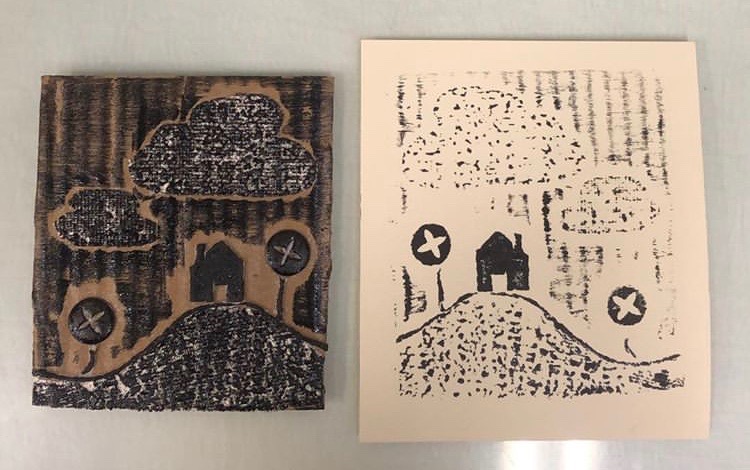
Students will learn to collagraph print using found objects and cardboard. This style of printmaking is accessible an can be made anywhere so it gives students a new method of creation for expression.
“Big Ideas”/ Essential QUESTION(s)
How can printmaking be made outside of the traditional printmaking studio?
How can printmaking change the way a student thinks about an idea or image?
Student Outcome Objectives
Students will:
1. Create a collagraph print and plate that demonstrates a place that is real or imagined.
2. Students will understand the process and steps that go into executing a collagraph print.
Prior Knowledge:
Students must be able to use shapes to create a picture
Lesson Preparation Timeline:
2/28:
- Observe at Residency center and further discuss lesson with Carmen Elate.
- Meet with Lynda Monick-Isenberg about planning backwards model, collect materials from the teaching artist closet.
3/4:
- Introduce the project and show examples to the class.
- Hand out plates and materials and have students begin to work on their plates.
3/7:
- Lynda Monick-Isenberg attends class to observe and help teach the lesson.
- I will do a printmaking demo with a previously used plate to emphasize how to actually make a print.
3/11:
- Students will all be printing by this day since they will have time in between lessons to complete their plate.
Examples of Artwork:

Additional Resources
https://www.handprinted.co.uk/ramblings/collagraph-printing
Assessment
This is a portfolio assessment. I will observe the work in comparison to the actually assignment to view what students understood and what things had been missed after explaining.
Students will caption or title their work to explain their setting that they created for their image.
Materials
Brayers
Water based black ink
Raised paper and fabrics
Cardboard plates
Retarder
Copper plate paper
Gloss medium
Learning Activities and Timing
Day 1:
1. Small presentation on what a collagraph print is and also the significance of setting.
2. Students will write down 5 settings that they can think of.
3. Show examples of a collagraph print.
4. Present materials and lets students start building their plates.
Day 2:
1. Will start the day by evaluating where people are with creating their prints, if any students are ready to print. Demo.
2. Demo includes a pre-made plate to create an example, use brayer and ink emphasizing how to know how much ink is enough ink and how to apply ink to the plate.
3. Students who are still creating their plate can do that while students who are printing can begin.
Teaching Artist Reflection
- Prints might come out too light
- Water based ink may dry too quickly creating failed prints.
- Students art will be hung up in the hallway to be seen by all in the residency center.